Create a shipment
1. Create a Lab Contact
To create a shipment, it is necessary to have a Lab Contact defined in ISPyB. This person will be our first point of contact regarding matters relating to your shipment. ISPyB allows you to easily register different Lab Contact profiles. Here is the link to show you how to create a Lab Contact.
For new proposals, a Lab Contact will need to be given a role in UAS which associates them to the new proposal ID. There is a role especially created for this scenario - Users can be an "Associate" on the proposal in UAS, which simply associates them to the proposal to be able to see it in ISPyB, without confering any additional abilities.
2. Create a Shipment
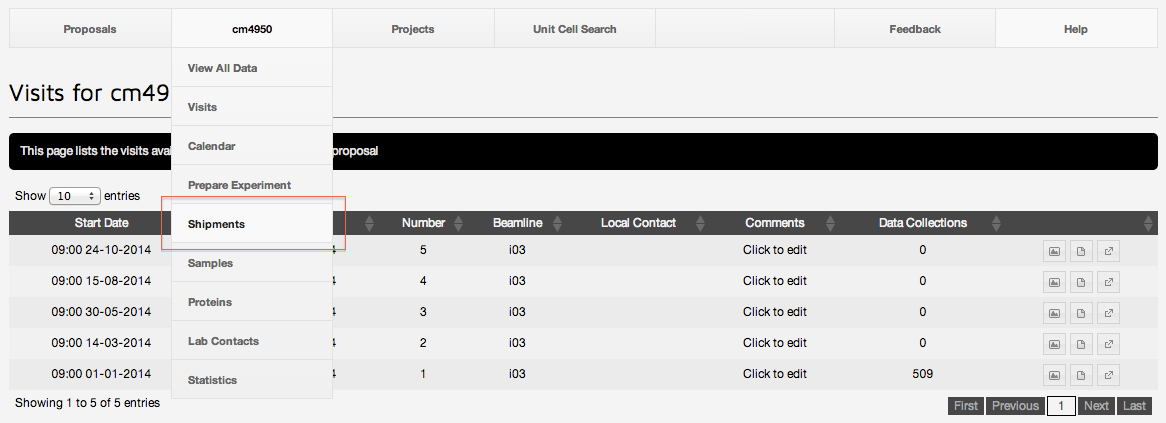
Once a relevant Lab Contact has been registered, select the "Shipment" page from the drop-down proposal menu.
3. Add Shipment
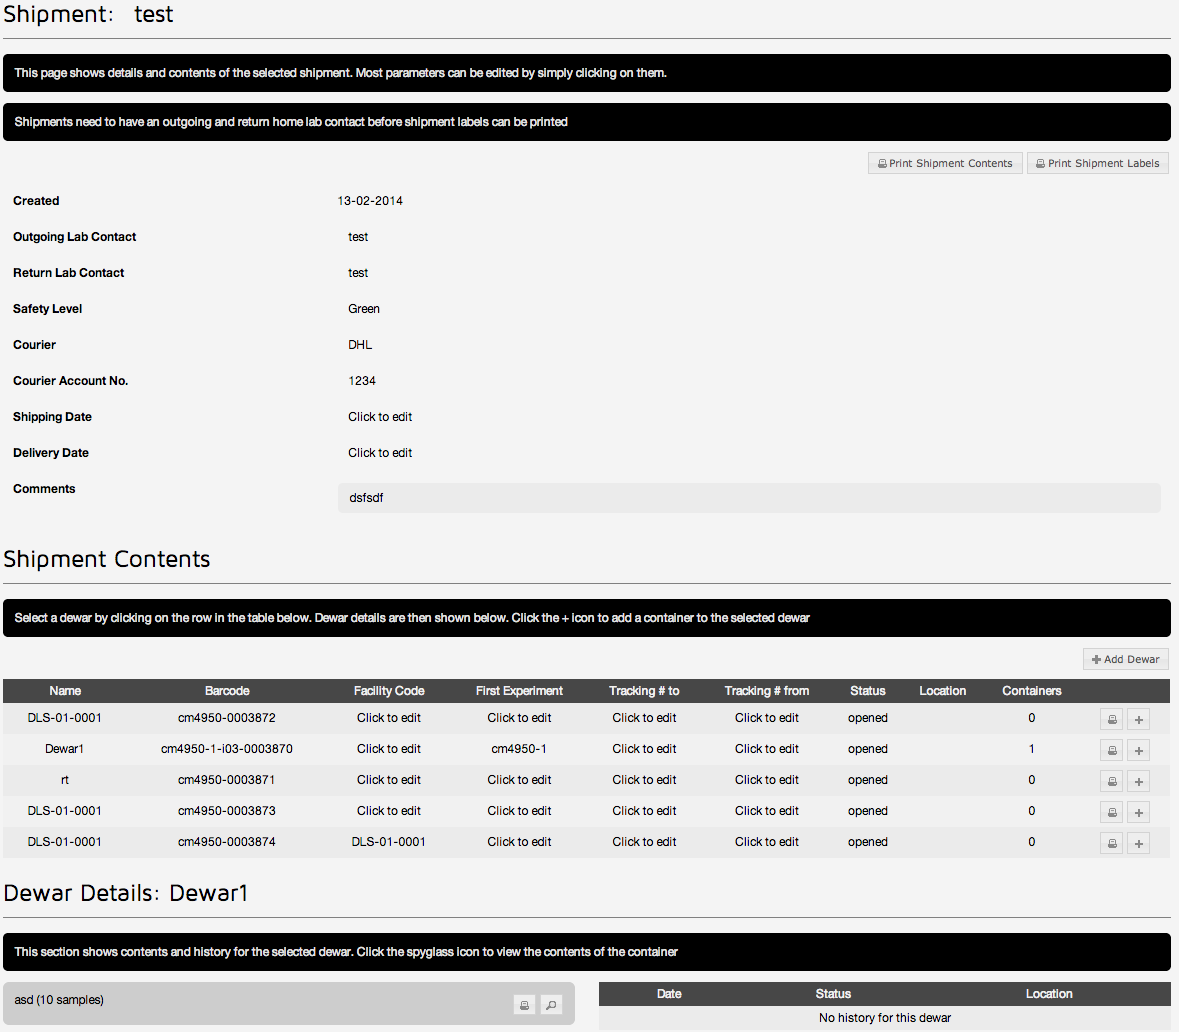
On the shipment page, you will see a list of all the shipments for the currently selected proposal. From this page, click the "Add Shipment" button on the top right hand side to register a new shipment.
Note that it is not possible to delete pucks from shipments, but you are welcome to create a shipment called something like "Trash" or "Ignore" and put any erroneus pucks in there.
4. New Shipment Form
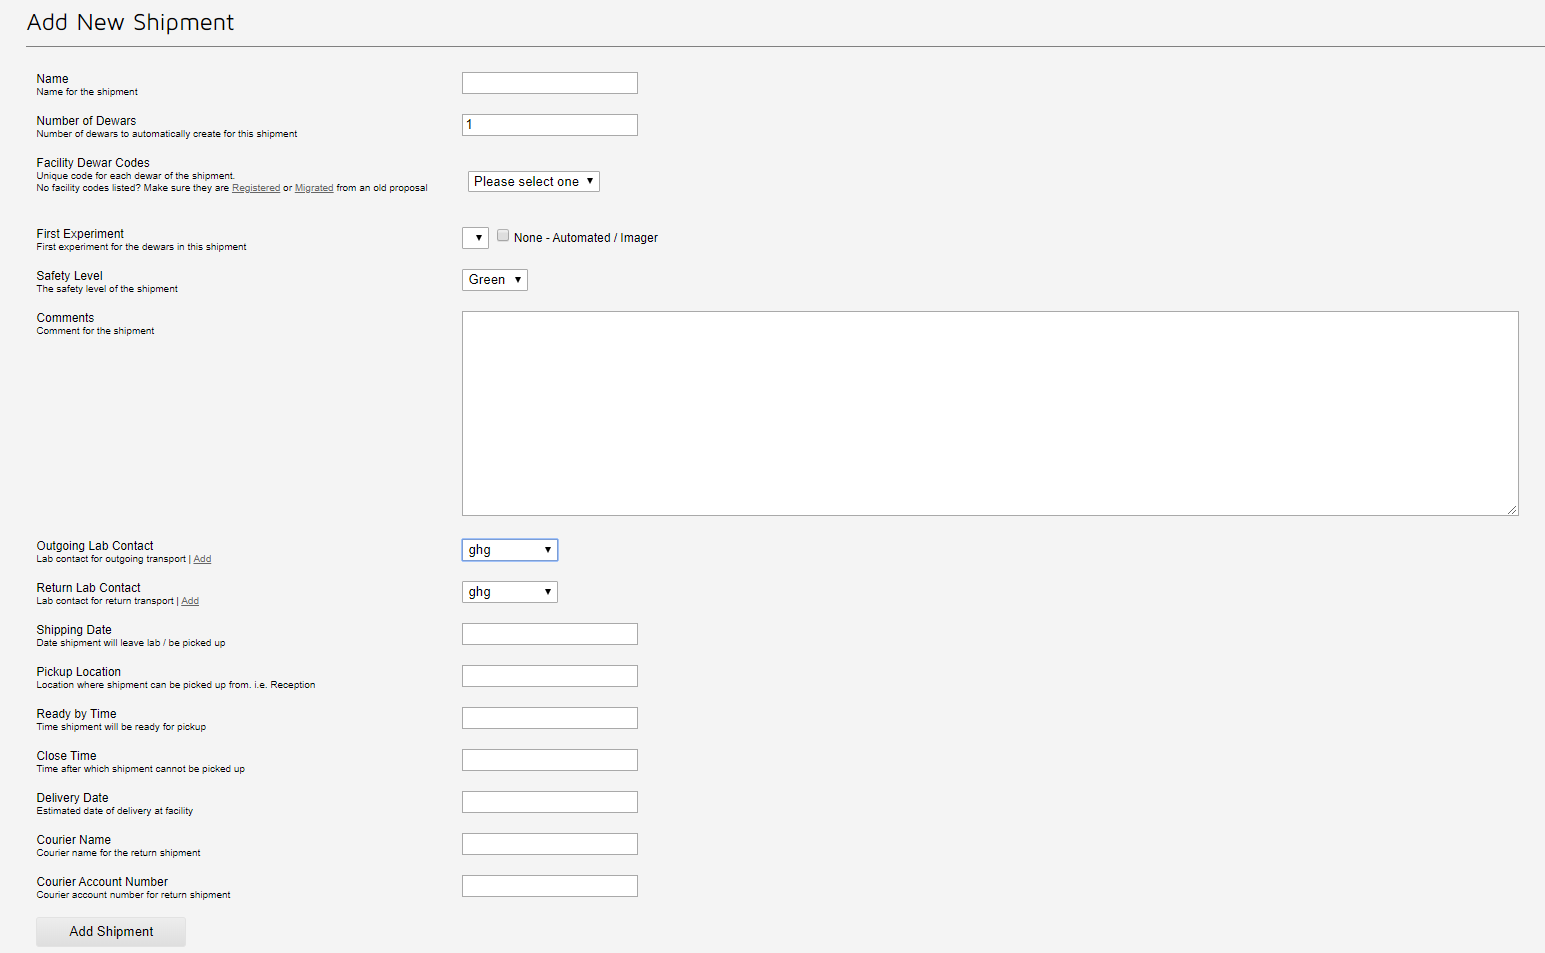
The new shipment form appears as shown above. You need to complete the information for your shipment here - and once you have done this, you will then define which samples will go into which pucks.
A particularly important question is that hightlight - of First Experiment/Scheduling. If you are shipping a dewar in for an already-scheduled visit, please select that from the drop-down list. If you are sending samples in for Unattended Data Collection (UDC) or in trays for VMXi please select the second option. And if you are wanting a visit scheduled Responsively for this dewar, it is important to select the third "Responsive/Mail-in" option, as this adds additional questions relating to your needs for this visit, to enable us to do the scheduling.
5. Courier Details
Although it is not compulsory, we strongly encourage you to provide the information about your courier comapny at this stage. As you are planning to send your dewar to Diamond, you probably have this information. For UK-based Users, making use of Diamond's free shipping, please leave these fields blank. However, it is important that you allow sufficient time between when you book the shipment, and when you say that it is available for collection.
6. Create Shipment
Once you have completed the form, click the "Add Shipment" button at the bottom. Your shipment has now been created, and the next thing to do is to define your pucks and samples. Please make sure that all pucks and samples have been entered, prior to shipping your dewar to Diamond.
7. Print Shipment Labels
When you have defined all of your pucks, at the top of the shipment page are 4 buttons:
- A. All User, please click "Mark as Sent" when your dewar is sent
- B. For UK-based Users, you automatically create your DHL Airway Bill by clicking here. Instructions are here for Users from the EU and the rest of the world.
- C. All Users, regardless of courier used, please click "Print Shipment Labels" and then apply these to your dewars. Whilst your dewar has a permanent ID, these labels relate to this specific instance of the dewar, and hold information about the pucks inside.
Please stick the dewar label (bottom of page 1) to the neck of your dewar, the outward label, to Diamond (page 2) to the outside of your dewar case, and include the return label, back to your lab (page) inside the dewar case for us to return it to you.
Please define all pucks and samples, prior to shipping the dewar to us. This will ensure that we can take any additional safety precautions that may be needed when your samples arrive at Diamond, and also enable us to efficiently schedule a Responsive visit.