- Instruments
- MX
- I04
- I04 Manual
- Introduction to Eiger2 X Detectors for MX at Diamond
Introduction
The MX group are in the process of updating beamlines with Eiger2 X detectors. This page provides useful information on the detectors, the file format we are using here at Diamond and how to use, view and analyse the data.
Specifications
| Detector | Eiger2 XE 16M | Eiger2 X 4M |
|---|---|---|
| Beamline | I04, I03 | VMXi |
| Active area (w x h, mm) | 311.2 x 327.8 | 155.2 x 162.5 |
| Pixels (w x h) | 4148 x 4362 | 2068 x 2162 |
| Pixel size (µm2) | 75 x 75 | 75 x 75 |
| Count rate capability (ph/s/pixel) | 107 | 107 |
| Point-spread function (pixel) | 1 | 1 |
| Silicon sensor thickness (µm) | 450 | 450 |
| Data format | HDF5 / NeXus | HDF5 / NeXus |
| Frame rate (Hz) | 560 | 560 |
File format
With Eiger2 detectors the file format and handling has changed compared with Pilatus detectors. The Eiger detectors do not write individual cbf image files, instead use the HDF5 format which is well suited to handling large data sets at high data rates.
Diamond has developed it's own file structure optimised for our network to optimise detector performance here. The structure of the data is similar to that produced by the Dectris internal file writer, but is not the same. To this end you will need to follow the instructions below to view and process data.
An example of the files produced for a 3600 frame acquisition (Given the ID of thermolysin_xtal1):
- thermolysin_xtal1_1.nxs
- thermolysin_xtal1_1_header.cbf (header only - to be loaded in adxv before the h5 frame files)
- thermolysin_xtal1_1_master.h5
- thermolysin_xtal1_1_000001.h5 (contains frames 1 - 1000)
- thermolysin_xtal1_1_000002.h5 (contains frames 1001 - 2000)
- thermolysin_xtal1_1_000003.h5 (contains frames 2001 - 3000)
- thermolysin_xtal1_1_000004.h5 (contains frames 3001 - 3600)
- thermolysin_xtal1_1_meta.h5
Data collection
Currently all data collection options are available (grid scans and rotation for MR, SAD and MAD, including line scan) with the exception of inverse beam SAD and wedge MAD.
We highly recommend fine slicing (omega 0.1o or 0.2o) with careful attention paid to speed and transmission (this is sample dependent - diffraction quality and radiation sensitivity). On I04:
- For strongly diffracting crystals 25-100% transmission at 12.658 keV with 0.008 - 0.015 s exposure for 180-360o
- Otherwise please try 100% transmission at 12.658 keV with 0.02 - 0.05 s exposure for 180-360o, paying careful attention to radiation sensitivity of your samples.
Collecting highly redundant, low dose data can be an effective way to collect high quality data, particularly if used in conjunction with random reorientation of the crystal using the multi-axis SmarGon goniometer. In this case using 5-20% transmission with 3 x 360o sweeps of a randomly reorientated crystal can be a useful strategy for a wide variety of use cases.
Screening
There are several approaches you could take to screen and assess crystals prior to data collection:
1) Using the 'Data Collection/Screening' tab in GDA, collect three images 45 deg apart in omega with the following default settings:
- oscillation angle = 0.15o
- delta = 45.0o
- exposure time = 0.04 s
- number of images = 3
- transmission = 100%
- detector distance = 200 mm (or select a resolution you expect your crystal to diffract to)
Results of strategies from EDNA and mosflm will be available in ISPyB and can be applied via the strategies button in the Data Collectoin tab of the Data Collection view. The XOalign results are also displayed in the case where a crystal alignment along a symmetry axis is possible with the SmarGon multiaxis goniometer.
2) Collect a low dose, continuous sweep, setting the detector resolution to the expected diffraction property of your sample. Suggested parameters (defaults in the GDA screening tab):
- oscillation angle = 0.2o
- exposure time = 0.008 s
- number of images = 300
- transmission = 100%
This data set will be processed automatically by fast_dp. The results can then be reviewed in ISPyB for point group, cell, diffraction quailty (bearing in mind this is a very low dose data set), etc prior to your data collection. If fast_dp fails try and longer exposure time than 0.008 s.
3) Alternatively, collect a 180 deg low dose, continuous sweep, setting the detector resolution to the expected diffraction property of your sample. Suggested parameters:
- oscillation angle = 0.2o
- exposure time = 0.008 s
- number of images = 900
- transmission = 100%
This data set will be processed automatically by fast_dp and the results may already be satisfactory. If needed adjust the parameter (exposure time, oscillation angle) to optimise.
Image viewing
![]()
![]() Images can be viewed when at or connected to Diamond via NX with the following software. We do not recommend you make decisions for data collections from viewing the compressed jpeg images you find in ISPyB. Please make use of available strategy information or by using the full image viewers below when making plans for data collections:
Images can be viewed when at or connected to Diamond via NX with the following software. We do not recommend you make decisions for data collections from viewing the compressed jpeg images you find in ISPyB. Please make use of available strategy information or by using the full image viewers below when making plans for data collections:
DIALS image viewer
From the DLS_Launchers folder on your desktop double click the Dials Image Viewer icon to open the last collected data set.
Alternatively to look at specific data sets use the Load File option from an already open viewer or, on the command line:
> module load dials
> dials.image_viewer /path/to/image_master.h5
See DIALS image viewer manual here
ADXV Autoload
The ADXV Autoload icon in the DLS Launchers has changed for the Eiger. It now launches a control window, through which you can cycle through your images, pause and unpause, and turn on/off features like resolution rings. It will automatically load image headers correctly, which won't happen through the normal adxv program (see below).
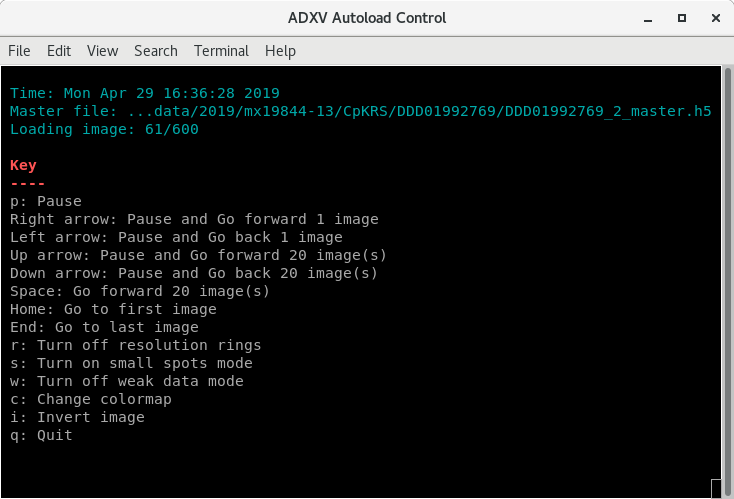
The commands are listed in the Control window, make sure the Control window is selected before pressing a key. By default, it will go to your latest data collection, and scroll through up to 30 images, at 3s intervals, with rings and weak data mode on. It will only find the latest dataset after it has finished collecting, so be patient.
ADXV
On the command line:
> module load adxv
> adxv
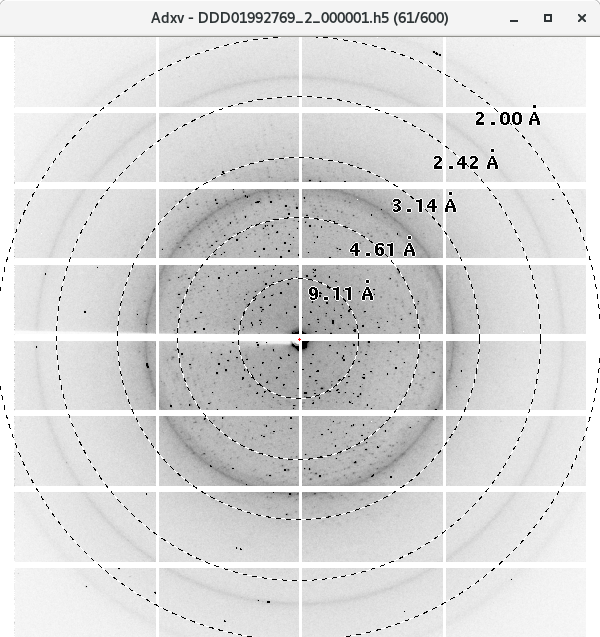
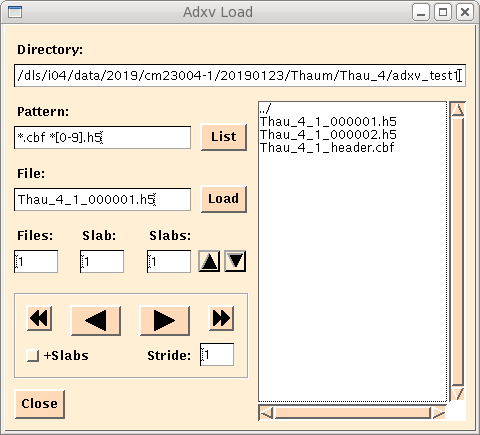
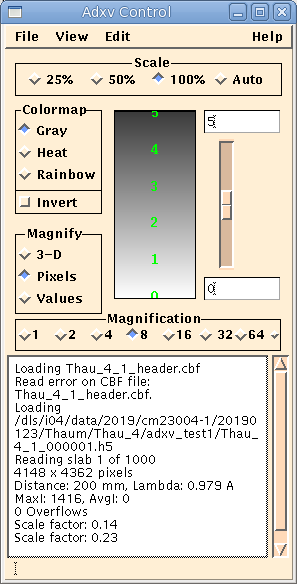
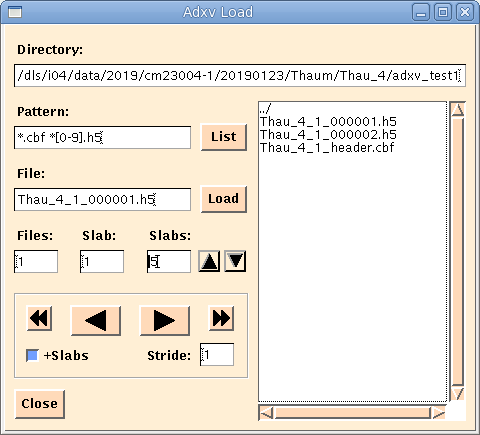
Browse to image folder and open the e.g. image_header.cbf file (in the figure below Thau_4_1_header.cbf) and then the image_000001.h5 file you wish to view (see figure), not the image_master.h5:
Zooming in to 50% or 100% shows the image with good contrast settings automatically.
With adxv as well as viewing individual frames, you can combine frames together using the slab fields. See figure below or page 29 of the adxv manual.
Albula
On the command line:
> module load albula
> albula
or double click on the Albula icon in Desktop_Launchers
Open master file.
Use tools:histogram to adjust contrast (both lower and upper levels) - autocontrast currently not working. Good starting values are: Background -4.0, Foreground 4.0
GDA Image Viewer
We are working on this.
Viewing results from Grid Scans
Results of the DIALs analysis are overlaid on the crystal image in both GDA and ISPyB. To view the diffraction images click on the box in the grid scan results tab or use your preferred image viewer from the list above. We aim to have the image viewing capabilities in ISPyB as soon as possible.
Data processing
Autoprocessing
Autoprocessing with fast_dp, xia2 DIALS and xia2 XDS and autoPROC all work and results are available in ISPyB.
Reprocessing your data via ISPyB works also. Instructions are here.
Manual Processing
DIALS
For manual processing with DIALS, xia2 is probably easiest -
> module load xia2
 > xia2 pipeline=dials image=/path/to/master.h5
If you have a massive data set i.e. multiple turns it can be substantially quicker to process this in blocks i.e.
> xia2 pipeline=dials image=/path/to/master.h5:1:9600:1200
to process in 8 x 1200 image blocks (relates to how DIALS refinement works).
DIALS Regular manual processing pipeline as shown in the tutorial will work fine:
XDS
For manual processing with XDS xia2 is probably easiest:
> module load hdf5/1.10
 > module load xia2
 > xia2 pipeline=3dii image=/path/to/master.h5 plugin=durin-plugin.so
You can also generate an XDS.INP input file automatically using eiger2xds as follows (do not currently use generate_XDS - this needs updating with this new detector):
> module load dials
 > module load hdf5/1.10
 > eiger2xds path/to/master.h5
If you wish to process with XDS at home then use the eiger2xds command as outlined above at Diamond and then copy home the generated XDS.INP file and update
NAME_TEMPLATE_OF_DATA_FRAMES= /my/data/is/here/at/home
and you will need to locally install the durin-plugin - see https://github.com/DiamondLightSource/durin and adjust LIB path appropriately in your XDS.INP.
If manually creating an XDS.INP file, the specific lines needed for the EIGER detector are:
DETECTOR=EIGER MINIMUM_VALID_PIXEL_VALUE=0 OVERLOAD=65535
SENSOR_THICKNESS= 0.450
NX=4148 NY=4362 QX=0.0750 QY=0.0750
LIB=/dls_sw/apps/XDS/20180808/durin-plugin.so
Example XDS.INP for I04:
DETECTOR=EIGER MINIMUM_VALID_PIXEL_VALUE=0 OVERLOAD=65535
 SENSOR_THICKNESS= 0.450
 DIRECTION_OF_DETECTOR_X-AXIS= 1.00000 0.00000 0.00000
 DIRECTION_OF_DETECTOR_Y-AXIS= 0.00000 1.00000 0.00000
 NX=4148 NY=4362 QX=0.0750 QY=0.0750
 DETECTOR_DISTANCE= 200.000000
 ORGX= 2214.85 ORGY= 2301.00
 ROTATION_AXIS= 1.00000 0.00000 0.00000
 STARTING_ANGLE= 0.000
 OSCILLATION_RANGE= 0.150
 X-RAY_WAVELENGTH= 0.97950
 INCIDENT_BEAM_DIRECTION= -0.000 -0.000 1.000
 FRACTION_OF_POLARIZATION= 0.999
 POLARIZATION_PLANE_NORMAL= 0.000 1.000 0.000
 NAME_TEMPLATE_OF_DATA_FRAMES= /dls/i04/data/2018/cm19645-5/Thaum/thaumatin_9_1_??????.h5
 TRUSTED_REGION= 0.0 1.41
 DATA_RANGE= 1 3600
 JOB=XYCORR INIT COLSPOT IDXREF DEFPIX INTEGRATE CORRECT
 LIB=/dls_sw/apps/XDS/20180808/durin-plugin.so
autoPROC
The command-line is as usual, as documented at
https://www.globalphasing.com/autoproc/manual/index.html
with the additional need for data from Diamond to have:
autoPROC_XdsKeyword_LIB=$(find $autoPROC_home -name 'durin-plugin.so’)
to ensure that the Durin plugin is used with XDS within autoPROC

Diamond Light Source is the UK's national synchrotron science facility, located at the Harwell Science and Innovation Campus in Oxfordshire.
Diamond Light Source Ltd
Diamond House
Harwell Science & Innovation Campus
Didcot
Oxfordshire
OX11 0DE
Copyright © Diamond Light Source. Diamond Light Source® and the Diamond logo are registered trademarks of Diamond Light Source Ltd
Registered in England and Wales at Diamond House, Harwell Science and Innovation Campus, Didcot, Oxfordshire, OX11 0DE, United Kingdom. Company number: 4375679. VAT number: 287 461 957. Economic Operators Registration and Identification (EORI) number: GB287461957003.